SonarQube setup on Azure App Service
As noted in a previous post, you can host a SonarQube on an Azure App Service, thanks to Nathan Vanderby, a Premier Field Engineer from Microsoft. He created an ARM template to run the SonarQube installation behind an Azure App Service with a Java host. This saves you a lot of steps mentioned above! You can find the scripts for it on GitHub or deploy it from the big deploy on Azure button.
 Photo by Vikram Sundaramoorthy
Several benefits you get from hosting SonarQube on an App Service:
- You don’t have to manage a Virtual Machine anymore.
- Setting up SSL becomes easier, thanks to the Azure App Service SSL being simpler (and free if you run on
*.azurewebsites.net). - Using a KeyVault for your secrets is now an option, you can inject those values as environment options.
- If you already have an App Service Plan, you can use that for hosting and cut down on your resources and cost (although, running on a burstable VM isn’t that expensive)
The biggest benefit is that the App Service already has Java installed! So no more downloading the JRE by hand, installing it manually and starting the SonarQube service by hand!
Setting up a new SonarQube server this way is a breeze. Updating it should be easier as well and that is the another big plus: you now have the ability to run the installation on a Deployment Slot, let it update the database and then switch to the slot. No manual updating anymore!
Set up
After creating the basic SonarQube App Service from GitHub or the ARM template, you need to create a new SQL database. Do note that you need to set the database to the correct collation for it to work: SQL_Latin1_General_CP1_CS_AS.
Creating a user
There are two options to create a new user in the database. You can create one like you would do in a full MSSQL server installation, by using the master database. Running this way on a Azure SQL Db has a couple of downsides:
- You now have a dependency on the master database. Every new connection will have to do a lookup in the master database and then route you through to the database you want to connect to. This will create a potential bottleneck from the master database, if you are running a lot of connections or a lot of databases on the server.
- Moving the database to another server takes more configuration, since the user configuration is not inside the database (see option two), but in the server itself.
Creating a contained user
A Contained user is a user account created inside the database itself, making it easier to move if needed.
Run this statement in a query editor connected to your database. Of course, you can make the user a data_reader, data_writer or something else.
Since I need the application using this connection also creating the tables, stored procedures, etc, I gave it DBO rights in this database.
CREATE USER [MyUser] WITH PASSWORD = 'Secret';
EXEC SP_ADDROLEMEMBER N'db_owner', N'MyUser'
Creating a regular MSSQL user
To create a regular MSSQL user if you do not want to have it contained in the database (see above), you can create a new SQL user by running this on the Master Database:
CREATE LOGIN SonarQubeUI WITH password='<make a new secure password here>';
Then create a login from the new user account by running this statement on the new database (you cannot use a use database_name statement in Azure SQL database, so you need to switch to it in the UI of your query editor):
CREATE USER SonarQubeUI FROM LOGIN SonarQubeUI
Settings
Copy these settings from the previous steps for next use:
- SQL Server address (
mysqlserver.database.windows.net) - DatabaseName
- MSSQL Username and password
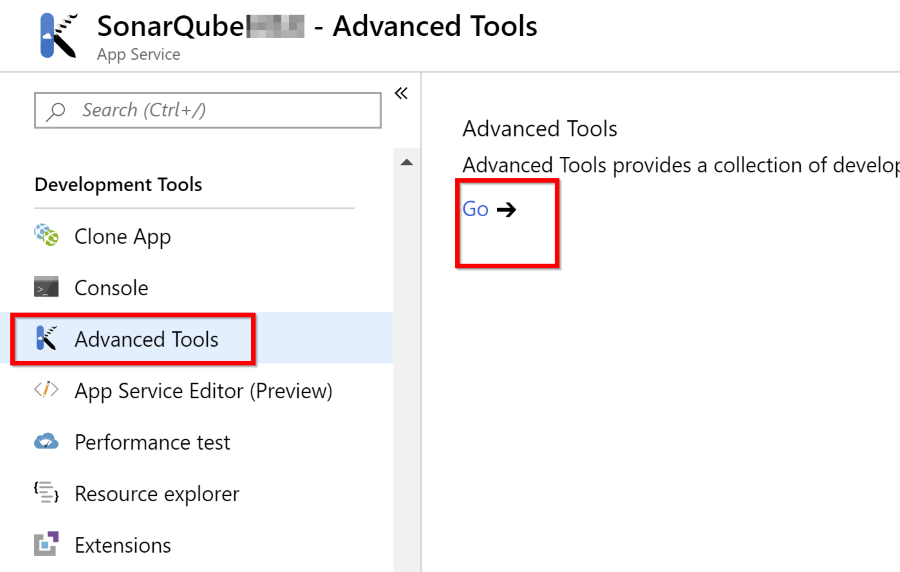
App Service update
In the Azure Portal, find your new App Service and navigate to Advanced Tools –> Kudu
Open a debug console:
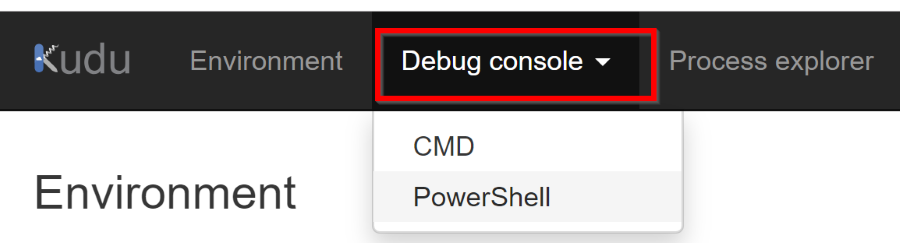
And navigate to the configuration folder of your SonarQube and open the file sonar.properties:
D:\home\site\wwwroot\sonarqube-7.7\conf>
Update these properties:
sonar.jdbc.username=SonarQubeUI
sonar.jdbc.password=<your sql server user password>
sonar.jdbc.url=jdbc:sqlserver://mysqlserver.database.windows.net:1433;databaseName=SonarQubeDb
Note the portnumber and the property of databaseName instead of database (this was changed in SonarQube > 5.3).
Also note that the database name your enter is CASE-SENSITIVE! SonarQube is running on Java, hence the sensitivity.
After setting these properties. Stop and Start the App Service again: SonarQube only reads in this file at startup and then initializes the new database.
Set an admin password!
By default, the admin login is admin/admin, so you want to change that ASAP (after setting up the database).
Errors?
If the SonarQube server doesn’t load after the changes, you can find the errors in the SonarQube folder here
/logs/sonar.log
/logs/web.log
Remember to restart the App Service after changing anything in the config!
Azure Active Directory
Setting up authentication for the users with Azure Active Directory is very easy, thanks to the work of the ALM Rangers. Follow the setup here.
Do note the Server base URL in SonarQube, I missed it the first time. By default, this is empty!
Go to Administration, Configuration, General –> Server base URL to set the url to match the url of the App Service.
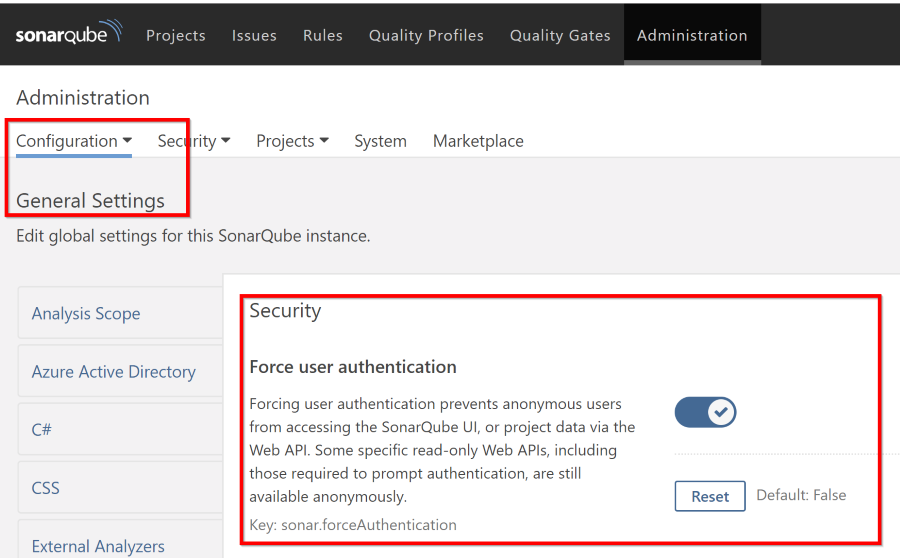
Blocking anonymous users
If you don’t want to show the state of your projects to the entire world, don’t forget to change the default setting for this. Since the free edition is available for open source projects, this setting is on by default.
You can find it under Administration: